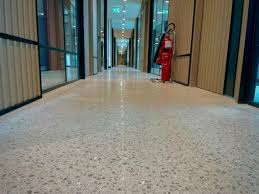
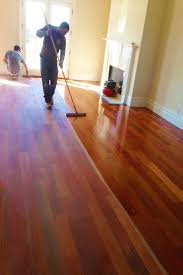
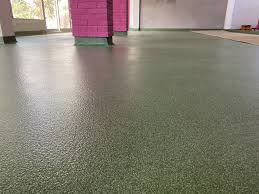
When it comes to flooring renovations, one of the most innovative and stylish solutions is microcement over wood. This seamless and highly durable finish can transform an old, worn-out wood floor into a sleek, modern masterpiece. Whether you’re working on a residential space or a commercial setting, applying microcement over wood offers a practical solution for achieving a contemporary aesthetic with minimal hassle.
In this detailed guide, we’ll walk you through the process of applying microcement over wood, explore the benefits of microtop flooring, and provide expert insights into how to ensure a long-lasting and flawless finish. We’ll also touch on some crucial tips and the tools you need to get the job done right.
What is Microcement and Why Apply it Over Wood?

Microcement is a versatile, thin layer of cement-based coating that can be applied to a variety of surfaces, including walls, floors, and countertops. It’s often used in modern interior design due to its seamless look and ability to be customized with different finishes, colors, and textures. Microcement over wood is an excellent choice for homeowners or businesses looking to modernize their space with minimal effort, as it allows you to preserve the structural integrity of your wood flooring while giving it a completely new appearance.
There are several reasons why microcement over wood has become such a popular choice:
Sleek, Modern Aesthetic: Microcement creates a smooth, seamless surface that complements modern, industrial, and minimalist design styles.
Durability: Once applied, microcement over wood creates a hard-wearing, long-lasting surface that can withstand heavy foot traffic and is resistant to water and stains.
Customization: Microcement can be tinted and textured to achieve a variety of looks, from matte to glossy finishes.
Minimal Maintenance: Unlike traditional wood finishes, microcement over wood requires little maintenance and is easier to clean.
Sustainability: Using microcement over wood is an eco-friendly alternative to replacing your floors entirely.
Tools and Materials Needed to Apply Microcement Over Wood
Before you get started on your microcement project, it’s important to gather all the necessary tools and materials. Here’s a list of what you’ll need:
Materials:
Microcement Kit: A microcement kit typically includes the base coat, finish coat, primer, and sealant. Be sure to choose a high-quality product from a trusted supplier.
Primer: This is essential for preparing the wooden surface and ensuring proper adhesion of the microcement.
Sealant: After the microcement application, a sealant is necessary to protect the surface from moisture and stains.
Filler: If your wood floor has any gaps or imperfections, you may need a filler to smooth out the surface before applying the microcement.
Tools:
Trowel: A trowel is used to apply and spread the microcement evenly over the wood surface.
Polishing Machine: To achieve a smooth and professional finish, a polishing machine is used to smooth out the final coat.
Sanding Paper: For prepping the wood and smoothing out any imperfections.
Brushes and Rollers: Brushes are used for applying primer, and rollers help distribute the final layer of microcement.
Step-by-Step Guide to Applying Microcement Over Wood

Step 1: Surface Preparation
The first and most important step in applying microcement over wood is preparing the surface. If the wood floor is glossy or has a protective finish, it will need to be sanded down to ensure the microcement adheres properly. Here’s how to do it:
Clean the Wood Surface: Sweep and mop the wood floor to remove dirt, dust, and debris. It’s essential to start with a clean surface to prevent any imperfections from forming once the microcement is applied.
Sanding: Sand the wood floor using a medium-grit sandpaper to remove any existing finish and create a rough texture for better adhesion. Ensure that you remove any oils or coatings that might prevent the microcement from bonding to the wood.
Fill Gaps and Cracks: If your wood floor has any cracks or gaps, use a filler to seal them. Allow the filler to dry completely and sand it down until smooth.
Clean the Surface Again: After sanding, make sure to vacuum up any dust and wipe down the floor to ensure a dust-free surface for the next steps.
Step 2: Apply the Primer
The next step in the process is to apply a primer. This ensures proper bonding between the microcement over wood and the wood surface. Use a brush or roller to apply a thin, even coat of primer to the entire floor. Make sure the primer is spread evenly, and be sure to cover every part of the wood surface.
Allow the primer to dry completely before moving on to the next step. The drying time will depend on the brand and specific instructions provided, so be sure to follow the manufacturer’s recommendations.
Step 3: First Coat of Microcement
Once the primer is dry, you can begin applying the first coat of microcement over wood. Use a trowel to spread a thin, even layer of microcement across the surface of the wood. It’s important to work in small sections to maintain a smooth application.
Apply the Microcement: Spread the microcement in a thin, even layer. Use a trowel to press the material into the surface, ensuring it bonds properly to the primer.
Allow the First Coat to Dry: Let the first coat dry for the recommended time (typically around 6–8 hours), ensuring that the layer is completely set before applying the next one.
Step 4: Sanding the First Coat
After the first coat has dried, it’s time to sand the surface again. This will smooth out any bumps or imperfections and create a perfect foundation for the second coat. Use fine-grit sandpaper to gently sand the surface.
Once sanded, remove all dust and debris by vacuuming or wiping the surface with a damp cloth.
Step 5: Second Coat of Microcement
Apply the second coat of microcement using the same method as the first. This layer will help fill in any remaining imperfections and create a more durable, even finish. Ensure the second coat is applied evenly, and allow it to dry completely before moving on.
Step 6: Final Polishing and Finishing Touches
After the second coat has dried, it’s time to polish the surface for a sleek, smooth finish. Use a polishing machine or a hand-held buffer to achieve a flawless, high-gloss finish. The final result should be a seamless, smooth, and modern-looking floor.
Step 7: Apply the Sealant
Once you are satisfied with the microcement finish, apply a sealant to protect the floor from moisture and stains. A sealant will help maintain the durability and longevity of your microcement over wood floor. Be sure to follow the manufacturer’s instructions regarding application and drying time.
Maintenance Tips for Microcement Over Wood
While microcement over wood is durable and easy to clean, it’s important to follow a few simple maintenance steps to ensure its longevity:
Regular Cleaning: Sweep or vacuum the floor regularly to remove dirt and debris. Mop the floor with a damp cloth and avoid using harsh cleaning chemicals that could damage the surface.
Reapply Sealant: Depending on the wear and tear, you may need to reapply the sealant every few years to maintain the floor’s protective layer.
Avoid Sharp Objects: Be mindful of sharp objects that could scratch or damage the surface. Place furniture pads under heavy furniture to prevent any unnecessary damage.
Conclusion
Applying microcement over wood is an excellent way to transform an old wooden floor into a modern, stylish surface that combines the durability of cement with the warmth of wood. The process requires careful preparation and attention to detail, but the result is a sleek, contemporary finish that is both aesthetically pleasing and easy to maintain.
If you’re considering a renovation project with microtop flooring or microcement over wood, Duphill Technical Solutions LLC offers professional services to help you achieve the best results. With years of experience in providing high-quality flooring solutions, Duphill Technical Solutions LLC ensures that your project is completed with precision and care. Whether you’re looking for a seamless microcement floor or a customized microtop flooring solution, Duphill Technical Solutions LLC is your trusted partner in achieving beautiful, long-lasting results.

